Are you still looking for some last minute decorating ideas for Halloween? Today I’m sharing a quick and easy way to spruce up a few ordinary flameless candles using sparkly vinyl and glitter decals. I have been snatching up Halloween frame designs from Jamie Koay like this one for a while and just waiting for the right project to use them on. So, when I came across a set of flameless candles on sale a few weeks back, I decided it was time to finally cut these designs out.
I knew that I wanted to cut the intricate frames out of black vinyl and then layer them over a bright and sparkly glitter mat to really bring out all of the details. After resizing each design to fit my different candles, I made a copy of each one that I could alter to be my mat layer.
I would need to delete everything from my second copy except for the outline of the shape to be left with a shape that I could use as my mat layer. Sometimes a design simply needs to be ungrouped, but in order to do this with these shapes, I had to select the copied shape and click on “Release Compound Path” in the Object Menu.
Now I could pull the outline of the shape away from everything else and delete all of the other cut lines left behind. This will give you a solid shape layer that you can cut from double-sided adhesive (for the glitter) and an intricate shape layer that you can cut from vinyl.
Filling each shape in with the appropriate color before cutting always helps me visualize the final product. You may notice that some of my mat layers are upside down here, but it served its purpose anyway!
After cutting and weeding my vinyl layer, I smoothed some transfer paper over it with my scraper tool and set it off to the side for reference. Although difficult to photograph, I also adhered my double-sided adhesive layer to the candle. TIP – When using glitter, I normally work over a few pages from an old magazine or other glossy surface (removed for photographing), followed by a layer of paper towels. This helps contain the mess and the glossy pages will allow you to funnel the glitter back into your container easily.
I wanted to mix glitters on my large candle to make the haunted house appear to be glowing a bit. Using the vinyl design as my reference, I poured orange glitter over much of the center of the design cut from double-sided adhesive, and red glitter around the edges. Then, I blended the overlapping areas with my finger to create a smoother gradient.
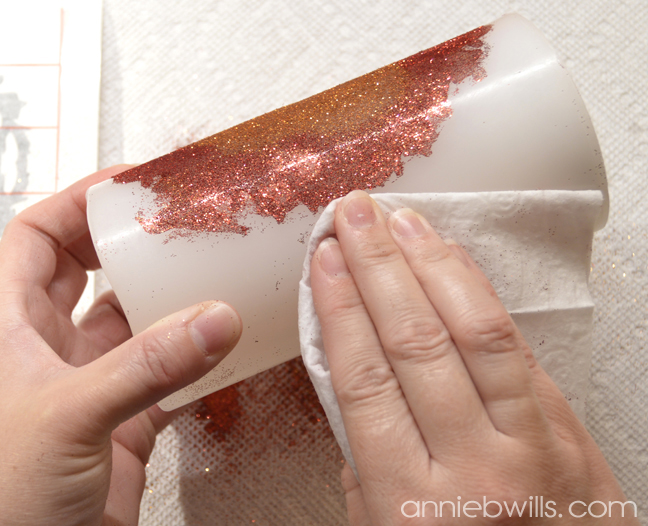
If your candles have a faux-waxy finish like mine do, you may have some excess glitter sticking to areas outside of your background design. Several swipes with a babywipe will take care of most of it while not removing the glitter from your double-sided adhesive.
Next, apply your vinyl design using the transfer paper. The transfer paper is just thin enough that you will be able to make out the edges of your glitter design in good lighting and get it lined up nicely. If it’s not aligned perfectly (like my skeleton candle), I think it still looks nice and almost like a shadow layer.
Use the scraper tool to adhere the vinyl well to the slightly waxy surface. This step also helps to burnish the glitter into the adhesive, leaving it less likely to flake off later.
Peel away the transfer paper carefully to reveal your new sparkly decals. Notice that the transfer paper also removes some of the excess glitter from the design as well as from the outside, leaving you less mess to clean up later.
Clean up the edges again with a babywipe if needed. I love how the blended glittering turned out…even if it was a bit off-center.
Repeat these steps with the remaining designs. As you can see, I only used one color for my other candles, but I think the glitter really brings out the detail in the black vinyl designs either way. Are you ready for Halloween yet?
Designs Used:


